Easy & Quick Meal – Tomato Rice

Seriously, it’s not (and never) easy to prepare dinner for the family after a day of work ( + rushing home and picking up the kids) – who can agree this with me?

I am in quite a fortunate situation already because my employer has a flexible hour scheme which allows me to start my day early and end half an hour earlier than the official end time.  In addition, my hubby and parents-in-law will help to pick up the children from the childcare / student-care most of the days. And yet, I still feel the stress and difficulty as much as most working mothers who want to prepare a proper dinner for the family.

This Tomato Rice is definitely a saver for a working mother like me, and cooking this allows my family to have our dinner by 6.45pm.  The “Tomato Rice Craze” started in October 2014 in Singapore after Ochikeron posted a video in her You Tube channel. The video is embedded in the end of this post.

IMG_2321

Tomato Rice
 
Prep time
Cook time
Total time
 
Author:
Ingredients
  • 2 cups uncooked rice (I used Korean rice)
  • 2 medium size tomatoes - choose the really orange/red ones
  • ¾ TSP salt
  • ¼ TSP pepper
  • 4 slices of salted butter
  • Handful of corn nibbles (I used frozen ones)
  • 2 slices of ham or hot dogs
  • Half a carrot
  • Spring onion (for garnishing)
Instructions
  1. Wash rice as per usual and add water you normally use for 2 cups of rice.
  2. Remove 8 TPSP of water from the rice pot (as the tomato and ingredients will emit water during the cooking process)
  3. Add salt and pepper, mix well.
  4. Remove the top and bottom of the tomato by slicing them off. I cut the tomatoes to quarters.
  5. Place the tomatoes in the centre of the rice pot.
  6. Wash and drain the frozen corn nibbles
  7. Remove the carrot skin and dice it.
  8. Cut the ham to small pieces or dice the hotdog
  9. Place the corn nibbles, carrot, ham/hotdog & butter slices in the rice pot, at the side surrounding the tomatoes.
  10. Place the pot into the rice cooker and start cooking it.
  11. When it's ready to serve, toss the rice lightly to mix the items together.

Little Extra notes from my personal observation / experience / preference:

  1. Instead of putting the tomatoes as a whole in the rice pot, I cut them into quarters.  The reason?  The juice from the hot tomato splatted on me when I tried to mix the rice on my first try with whole tomato. Yah, I am THAT careless.  🙁  So by cutting them into quarters, there’s no “tomato-explosion” anymore!
  2. I took out 8 TBSP of water instead of 6 because I like rice to be “harder” then to be mushy. However, the rice is still a little mushy if we eat it once the rice is cooked. If the intent is to leave the rice warm in the cooker for sometime (1-2 hours) before eating, 6 TBSP of water removed should be just right.
  3. I used salted butter instead of olive oil because we like the fragrance. Let’s not think too much for this because tomato rice already sound like a very healthy dinner! :p
  4. The cook time very much depends on your rice cooker.  My rice cooker is Zojirushi and it usually takes 45 minutes to cook the rice. I can finish a lot of other chores while waiting for the rice to cook and hence I said that this is a saver for working moms.

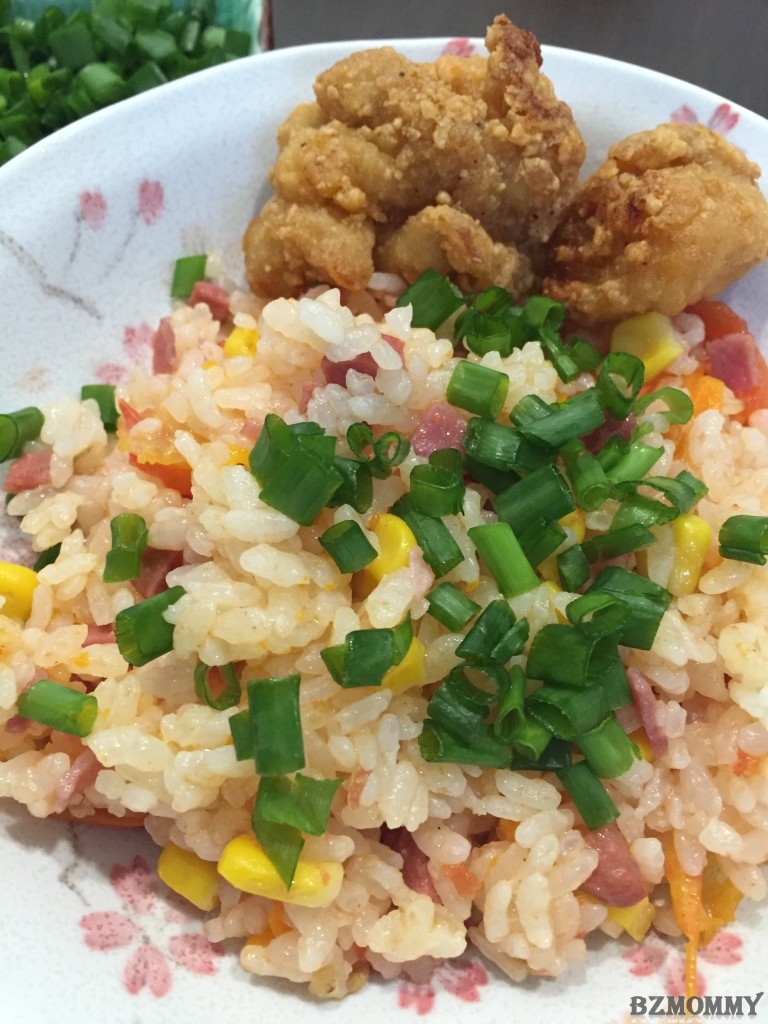
This one-pot rice is versatile and you can add different ingredients to make different type of tomato rice. Some other suggested ingredients are capsicums, crab-stick, bacon, peas, fresh pieces of chicken and many others!  You can also add sides to this rice such as teriyaki salmon, cod fish or even baked chicken karaage – which I have done in the photo shown above.

Kudos to easy and one-pot meals!

Drawings of a 8 Year old

It’s definitely amazing to see how children progress in their drawings, from early childhood (1-3 years) to school age (6-12 years). They started with faint lines (or marks) when they first hold a writing/drawing instrument and started with a lot of imagination with the lines that they drew. Those little “marks” on the paper can be the birds that they imagined, or their favourite person and food.

Then the lines or marks became “stronger” and more defined and they slowly evolved to irregular shapes that seems like oval or circle. They learned to control their strength and you can really see that they seem to be struggling with a skill which is so normal to most of us.

I was very amazed with what Dawn drew recently because it was such a different picture compared to how she drew in the past. It really showed how far we came (or aged) and how she had continued to improve on her own without much guidance.  Though these may be nothing compared to those children who can draw really well, these 2 drawings are enough to make me weld in tears like a super emotional mommy.

Cheers to motherhood!!

IMG_2359

IMG_2360

What is your magic number for Retirement?

This is nothing new to most of us.  With an aging population and increasing prices, I cannot help to be concerned about whether we have save enough for our own old age. Are you?

Even though it is NOT something new to me, and knowing that it is better to “start early than later” kind of theory, how many of us are really doing enough about it?  After our daily expenses plus the fixed commitment, and the expenses on the children, how much are we left with each month to save or invest? I do not know about most of the people around us, but it can sometimes be depressing to look at myself.

I never really thought of looking at the magic number for the longest time in my life, probably I do not want to be depressed further. However, as what most will say, knowledge is king! And so I must know!

So, I need to find out 2 things:

  1. The magic figure that I need for my retirement years, and
  2. The gap that I need to close in order to reach the magic figure by my retirement age.

I did a search for “Retirement Calculator” and was directed to a few local sites that offer an online retirement calculator. It is important to use a local site because it may be closer to our standard of living.

And guess what?

NTUC Income suggested that I need $555,000 based on the retirement lifestyle that I have chosen. And that’s $1,850 per month for 25 years of retirement.

NTUC1NTUC

I moved on to try Aviva Retirement Planner and this is what the planner suggested:

Aviva

Notice the huge difference between the magic figures? Well, Aviva’s planner factored in other spending such as healthcare, household to even phone bills! While we can say that we can live a simpler life when we retire, I will definitely want to stay connected with my children and grandchildren in this digital age, right? So I still need mobile devices (for God knows what it will be like in 40 years time??) or connection then.

Wow! So my magic figure is between $550,000 – $1M. I guess having to chose the really basic “needs” in these calculators, this amount is about the same for most of us (unless you belong to the high net worth population or require an above average kind of retirement lifestyle).

So what’s next after knowing the magic figure? It is to look at what’s the current status, and what are required to be done with the leftover years before the chosen retirement age.

I tried 2 calculators, one from Tokio Marine and the other from DBS/POSB. There are others such as from CPF board, Manulife etc.

And that’s where depressing news sets in….whether I am not saving/investing enough, or I am not young anymore! Ewwwww!! (Results differ from different sites, so please use at your own discretion)

TMasia

DBS

Ok, maybe it’s not bad for most of you.  Just treat this as a finding-out for knowledge session, and use it to plan forward. Whether the figure comes out to be out of reach or difficult to achieve, we need to be realistic and most importantly, start to do something about it. It’s always better to know it now, then at age 65, right?

Disclaimer : The link to the sites stated above are from my own research. There are no affiliation between them and myself. 

Home-made Pickled Green Chilli

I am not someone who can take in a lot of spicy food, mainly because my mother had seldom (never!) cook spicy food for us since I was young. My spicy journey only started after knowing my hubby and later on had a fast-track progression after staying with my in-laws.

Despite the fact that I am a better spicy-food eater than before, I still prefer my food less spicy so that the taste of the food remains “real”. I like my plate of Char Kway Teow to taste like Char Kway Teow and not like a plate of Char Chilli Padi – if you know what I mean.

Having said the above, I still cannot remember why and how I learn to eat cut pickled green chilli with fried bee hoon, or with gravy hor fun. I can’t even remember where my courage first came from. Many will say that green chilli is not spicy but this is something I will not totally agree to as I tasted really hot green chilli before!

IMG_9336

I chanced upon Noobcook’s pickled  green chilli recipe and decided to follow and make my own. After all, the Zi Char stall will only give a miserable small packet of green chilli whenever we buy take-away.

Home-made Pickled Green Chilli
 
Author:
Cuisine: Condiments
Ingredients
  • 1 packet of green chilli (NTUC sells them in a packet - about 10+ green chilli)
  • 1 cup white rice vinegar
  • 90g fine sugar
  • ½ TSP salt
  • Boiling water
Instructions
  1. Soak the chilli and gently wash them clean (I use a brush for my vegetables).
  2. Slice the chilli and place the sliced chilli in a colander.
  3. Pour boiling water into a bowl and place the colander of chilli into it. Let it stand for 20-30 seconds.
  4. Drain the chilli.
  5. Dissolve the fine sugar and salt in the vinegar using low heat on the stove.
  6. Leave the vinegar to cool.
  7. In the mean time, put the drained chilli into a glass bottle.
  8. Pour the cooled vinegar into the glass bottle (make sure that all the chilli is covered by the vinegar. Refrigerate it.

It will be good to use disposable plastic gloves to protect your hands while slicing / handling the chilli. We didn’t do that during our first attempt and ended up with fiery hot fingers!

The chilli will look bright and green for the first few days, and will slowly turned to a dull shade of green.  From my experience, the pickled green chilli will remain quite spicy in the first few weeks and will lose the spiciness after about 4 weeks.  It will taste like what we get from the Chinese restaurants or the Zi Char stalls, if not better!

IMG_9069

Pickled Green Chilli before putting it into the refrigerator

You can also get a glass bottle easily from Daiso. I love this glass bottle of mine because it comes with a handle at the top.

I keep the pickled green chilli for a few months in the fridge and they still taste crunchy and delicious. I do not have an idea how long they can be kept, but since this process seem to be doing some form of food preservation using sugar, vinegar and refrigeration, I assume that they can be kept for quite a while.

IMG_9512

Working Hard

I am working hard….to put back the missing old photos for my blog archives.

Sometimes I can’t help to think that all these happened because of my “itchy backside” or rather “itchy fingers” which seem to be a more appropriate description.

I started with a BlogSpot site in January 2007. After much consideration, I got my own domain name in May 2008 and started documenting my musings there for about 5 years before I change it to my online shop. You can also read more about the change here.

This year, 2015, I started the year setting up this site so that I can continue to write my nonsense musings. It is definitely a joy to read through my previous thoughts, my children growing years, the sweet little things that my hubby did and my growing older wiser years.  It’s a booster / reminder to myself that I have lived and am living.

The urge (to set up this site) came with late nights and headaches because I realized that a lot of the old photos were not properly exported from the previous site. I managed to put back most of the photos till about 2010 archives. Those photos that went away with my faulty laptop seem to be lost forever. {cry}

Pardon me for the missing photos, those ugly empty box with a cross on the left corner are truly eyesores! I will not be “itchy backside” or “itchy fingers” again, I promise! …. {whisper} for at least the next 5 years…

Korean Side Dish – Stir Fried Fish Cakes / 어묵 볶음 (Eo-muk Bo-kkeum)

I love eating Korean food.  I came to love cooking them too. In my opinion, most Korean dishes are rather easy to prepare, and most of the time, the taste would not go too wrong for a novice home cook like me.

A Korean meal is not complete without side dishes (반찬 Ban-Chan), and usually we will be served with Kimchi (김치). I was given this Stir Fried Fish Cakes in one of my favorite Korean Restaurant and I immediately fell in love with it. 

This is how I prepare this dish at home.  I will usually cook a batch, and keep them in an air tight container after it has cooled down.  This Ban-Chan can be kept in the fridge for 3-4 days and it’s good to go with rice or porridge.  It’s a good side dish for adding into bentos or lunch boxes too!

어묵 볶음 (Eo-muk Bo-kkeum)

어묵 볶음 (Eo-muk Bo-kkeum) prepared by BZMOMMY

I bought the Korean Fish Cake from Lotte Korean Mart and this is how it looks like in packaging.  There are also other brands available.

IMG_1837

The fish cake came in one big sheet. I prefer to cut them first before parboiling them.  It is really up to your preference. To remove the oil on the fish cake, please remember to parboil the fish cake before adding them to the wok.

IMG_1838

Can you see the oil on the water?

IMG_1839

Preparing and cooking this Ban-Chan is easy.  I can only say, use the correct ingredients and sauces and this dish will turn out pretty well. There is a reason why I specified Korean sauces in the recipe below. The taste and the aroma from Korean sauces are very different from Chinese sauces.  The best comparison is between Chinese Sesame Oil and Korean Sesame Oil.  I had tried making this using Chinese sauces, but the taste and smell is no where near to what this Korean Ban-Chan should taste or smell like.

IMG_9535

A dish that is ready to serve! I am salivating now by looking at this picture!

IMG_9536

Stir Fried Fish Cakes / 어묵 볶음 (Eo-muk Bo-kkeum)
 
Prep time
Cook time
Total time
 
Author:
Cuisine: Korean
Ingredients
  • 3 pieces of Korean Fish Cake
  • 1 medium red onion
  • ½ carrot
  • ½ Red Capsicum
  • ½ Green Capsicum
  • 1 TSP Cooking Oil
Seasoning
  • 2 TBSP Korean Soy Sauce
  • 2 TBSP Korean Corn Syrup
  • 2 TSP Mirin / Rice Wine
  • 1 small serving of chopped Garlic
  • 2 TSP Korean Sesame Oil
  • 1 TSP of Korean Gochugaru (고추가루 Chilli Flakes) - add or reduce according to own taste
Instructions
Preparation
  1. Wash the red and green capsicums, remove the seeds and cut into strips.
  2. Wash the carrot, remove the skin and cut into strips.
  3. Slice the onion thinly.
  4. Cut the fish cake into small rectangles. Parboil the fish cake to remove the oil.
  5. Mix all the seasoning in a bowl
Cooking Time
  1. Heat up a wok and pour in the cooking oil
  2. Add in the onions and the carrots, and stir for about 3 minutes
  3. Add fish cakes & capsicums, and stir for another 2 minutes
  4. Add the seasoning and stir for about 1-2 minutes before dishing it up


Kitchen Fun Time #5 – Sandwich Meal

Sandwiches are quick and easy meals, especially after a long day at work. Long gone are the days where the belief that bread are only for breakfast. Instead of paying for $10 (or above) for a simple sandwich meal in restaurants, why not do it yourself? It is a good way to involve the kids – to eat what they make!

Prepare the ingredients (omelette, washed lettuce, sliced cucumber, blanched ham etc) and place them on the serving table. Let your kids “assemble” the sandwich with some initial guidance. After they are done with their own sandwich, ask them to make you one too! 🙂

Here’s how Dawn likes her sandwich to be….first with ham…

IMG_1500

Then the omelette…

IMG_1502

With lettuce & cucumbers….

IMG_1504

IMG_1503

And enjoy the sandwich!

IMG_1506

But, before tucking in, make one for mommy first ok?

IMG_1508

There you go, 2 sandwiches assembled in less than 5 minutes. 🙂

IMG_1509

There are a lot of variations that you can do for sandwiches meal.  Make it “complete” like those served in restaurants by adding some potato chips and greens at the side, or add some scramble eggs as well.

IMG_0463

Tip : Cut the sandwich into small 4s and use a toothpick to keep the items together, for the little hands.

IMG_0455

IMG_0454

The man of the house prefers his sandwich to be in whole…

IMG_0459

The cute things that a 4 year old will say

I had a day of spring cleaning the house, and decided to enjoy a hot bath in our seldom-used bathtub in the evening. When I stepped out of the bathroom, I heard this cute little conversation between Eva and Daddy.

Eva : Daddy, what is mommy doing?

Daddy : Mommy is bathing.

Eva : She is using the bathtub?

Daddy : Yes, darling.

Eva : But…But she is a big girl already! Big girl cannot use bath tub.  Bath tub is for small girls!

>> I can’t help but to laugh while combing my hair. 😀

*******************

Every morning, my Father-in-law will fetch Eva as early as 6.45am, and he will bring her to school at 7.30am. I enjoy the little conversations with Eva for that short 5 minutes walk to where my father-in-law will wait for us. I will also say my goodbyes and kisses before we reach the meeting point (because she will “fly” to her grandpa the moment she sees him).

Our usual goodbyes and kisses conversation goes like this :

Me : Bye Bye Eva

Eva : Bye Bye Mommy

Me : *Plant a kiss on her cheeks

Eva : *Plant a kiss on my cheeks

Me : Enjoy your school ok?

Eva : Ok.

And she surprised me with an additional sentence after her “OK” since yesterday.

Me : Enjoy your school ok?

Eva : Ok. Mommy, you enjoy your work ok?

My heart melted with sweetness after that sentence came out from her little mouth. It brings parenthood to much enjoyment, especially when children do sweet and thoughtful things, without being asked to. Not once have I asked her to say that to me, or even expected her to, but the words that she speaks from her heart, do surprise me many times!